Our Blog
Latest news and updates from PiVPS
How to Enable Audio Play Back in Windows VPS?
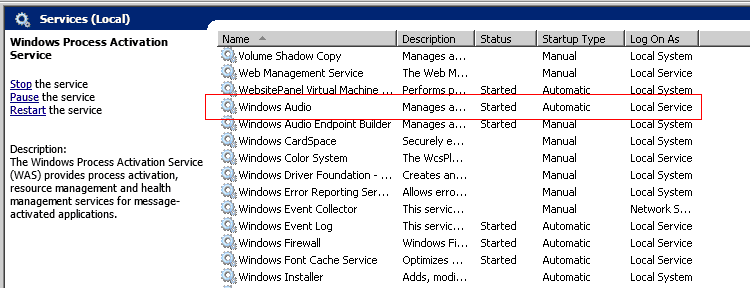
1. Enable ‘Windows Audio’ service
1.1. RDP connet to your VPS and head to Services MMC (Start > Run > Services.msc).
1.2. Locate ‘Windows Audio’ service and start it. (It is recommend changing the ‘Startup Type’ to ‘Automatic’).
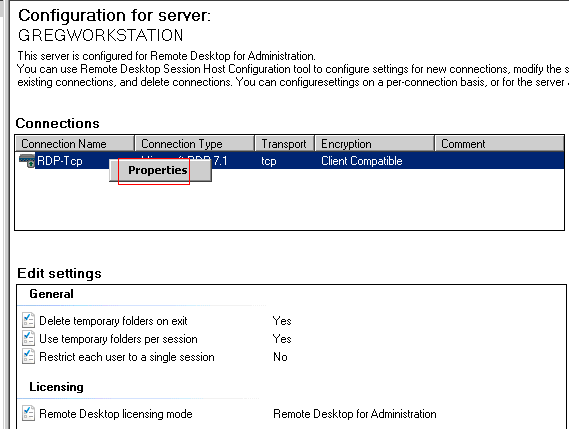
2. modify the Remote Desktop host configurations
2.1. Go To Start > All Programs > Administrative Tools > Remote Desktop Services > Remote Desktop Session Host Configuration.
2.2. Under the section labeled ‘Connections’ select ‘RDP-tcp’ connection.
2.3. Right click on the connection and go to ‘Properties’
2.4. Go to the ‘Client Settings’ tab and un-check both ‘Audio and video playback’ and ‘Audio recording’ to enable these features.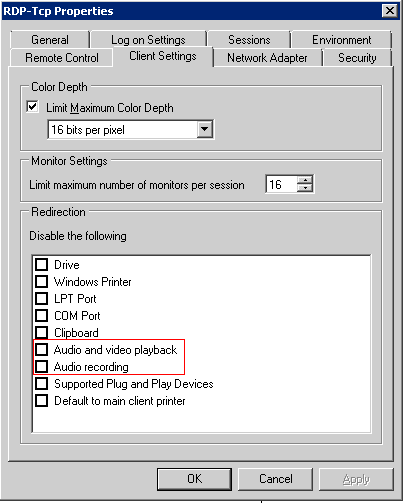
2.5. Now you can log off your RDP session to take effect.
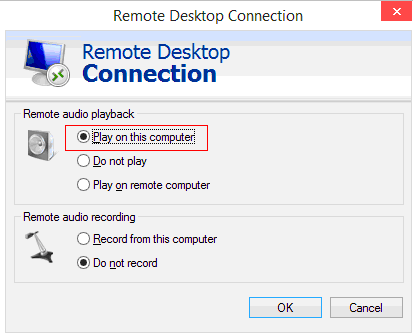
3. Configure RDP client for audio
A. Launch your RDP client. (Start > Run > mstsc)
B. Click on Options and then head to ‘Local Resources’ tab.
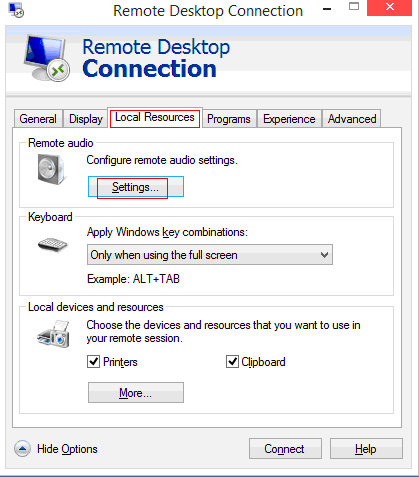
C. Click on Settings and then ensure that ‘Play on this computer’ is selected.
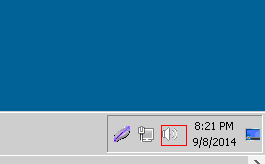
Ok, Now you can see active video now.
Copyright © PiVPS Ltd. All Rights Reserved.