Our Blog
Latest news and updates from PiVPS
How to use Rescue Mode to backup/download your important data
What is Rescue Mode?
Rescue mode is a term used to describe a method of booting a small Linux environment completely from diskettes.
With Rescue mode, you can easily backup/download your data from your VPS if you can not access your VPS any more.
When should I use rescue mode?
Here is some case when you will need to use rescue mode to download/backup your important data:
- You forget password of OS and Can not access your VPS any more.
- Your OS are failed to boot up.
- Your OS has virus inside and you can not access normally any more.
- Disk storage is failed.
- When you need to download important data from VPS without accessing the VPS.
How to use rescue mode?
There are many steps to use rescue mode and download your important data inside the VPS.
You need to download and install these software if you dont have any of them.
Bitvise SSH and SFTP Client: https://www.bitvise.com/ssh-client-download
It may takes some minutes to download and install bitvise client.
Step 1: Go to VPS Control Panel
- Login your account at: https://portal.pivps.com
- Go to: Services -> My Services
- Chose your active VPS and click [Manage]
- In management page of VPS, You can see a control panel to manage your VPS.
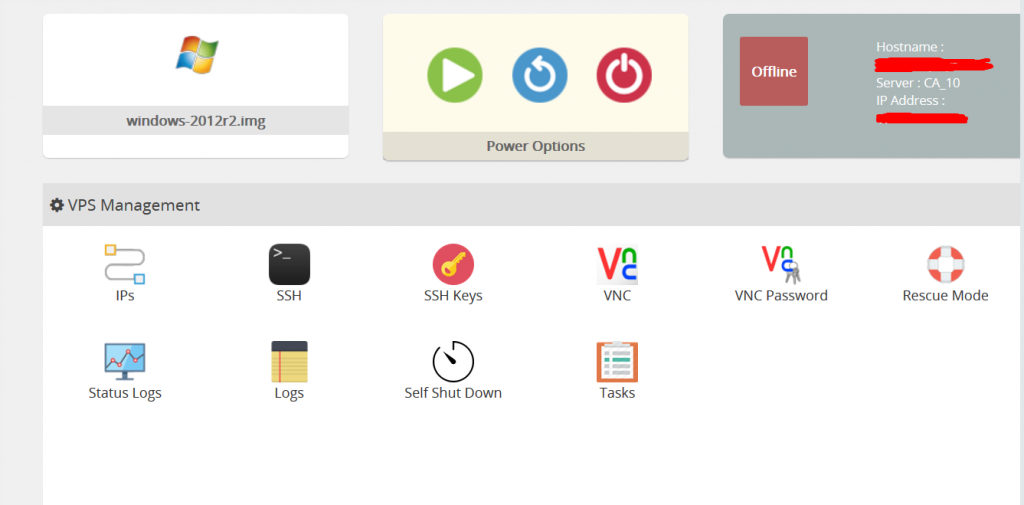
Step 2: Power Off your VPS.
Click the Power Off button to turn off your VPS.
It is very important that you need to power off your VPS.
Step 2: Enable Rescue Mode.
Click the Rescue Mode button.
You will see a windows to enable rescue mode. You will need to set the password of rescue mode.
You can use any simple password.
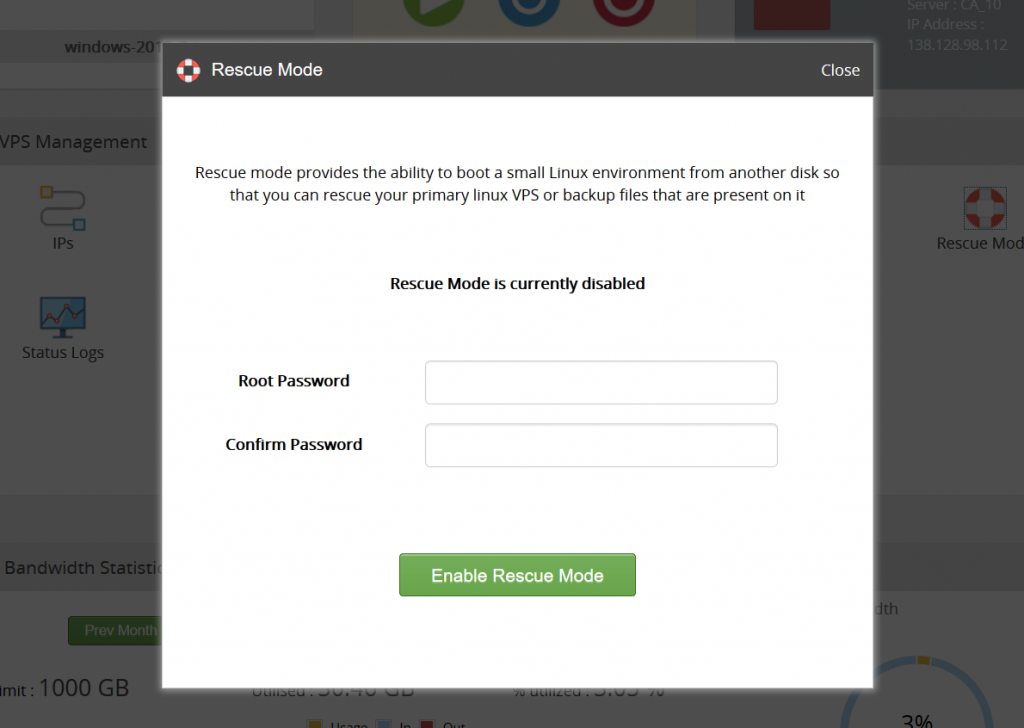
Now, you can click Enable Rescue Mode.
Step 3: Login to your rescue mode of your VPS.
Open Bitvise SSH client:
And input your VPS Main IP and rescue mode password.
Host: Your VPS IP.
Username: root
Password: your rescue mode password
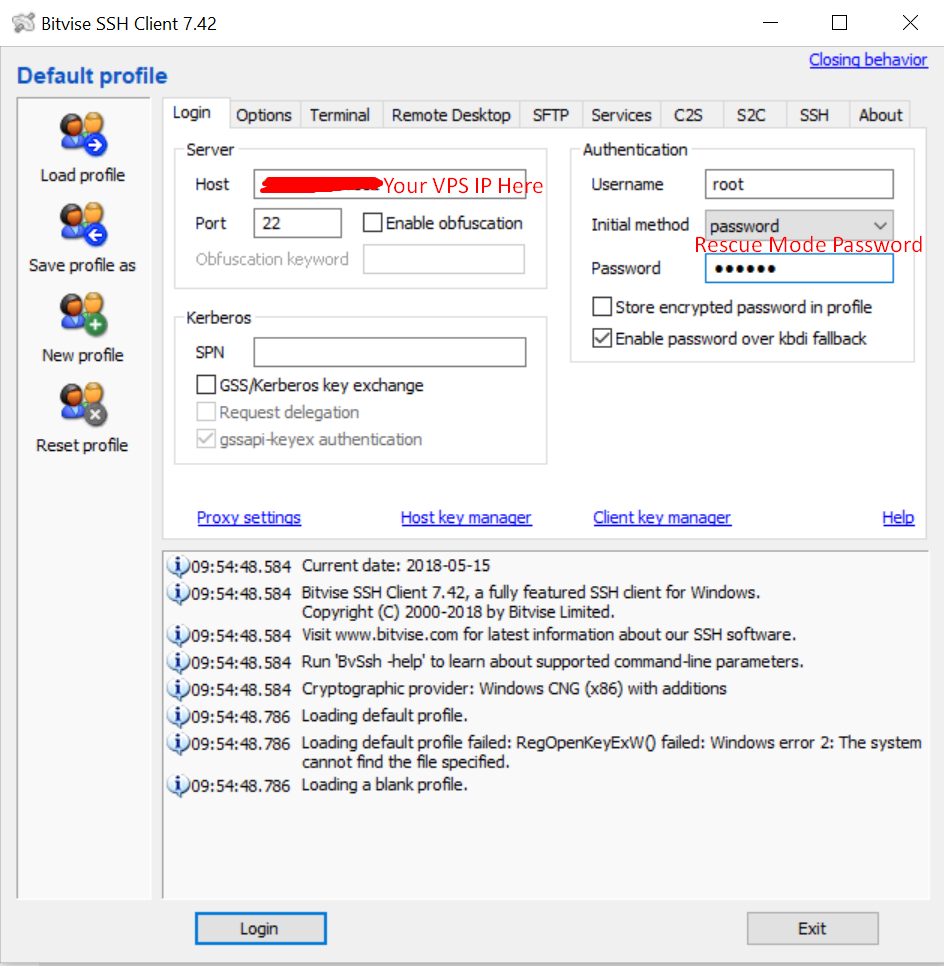
Now, click Login to login as root to rescue mode.
You can see SSH command line and Sftp file browser now.
Step 4: Mount Your Disk Space Into Rescue OS.
Run these command:
#fdisk -l

You can see the device name here: /dev/vdb1
In some case, it may be different such as /dev/sda1 or /dev/sdc1
You should see the size of disk device so detect your VPS disk space.
Now, you can run these command to mount this disk to rescue mode OS.
+ Create mount directory:
#mkdir /vps
+ Mount /dev/vdb1 to /vps folder.
Remember: You need to fix this command if your device is incorrect!
#mount -t auto -o ro /dev/vdb1 /vps

+ You can run this command to check:
#df -h
Result:

Ok, it is done. Mount successfully!
Now, Close the SSH command line, Then open SFTP client.
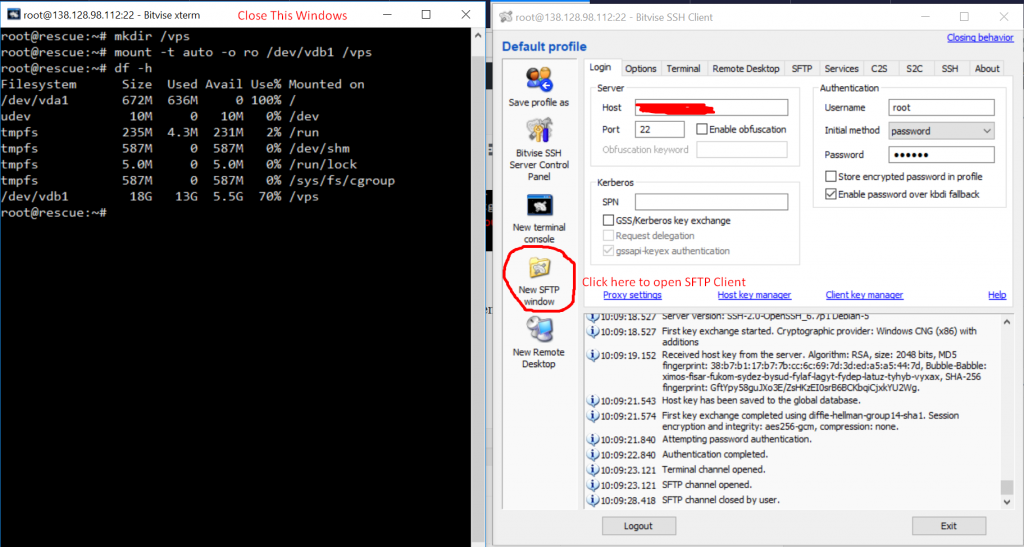
In SFTP Client, You can go to /vps directory to see all your files here.
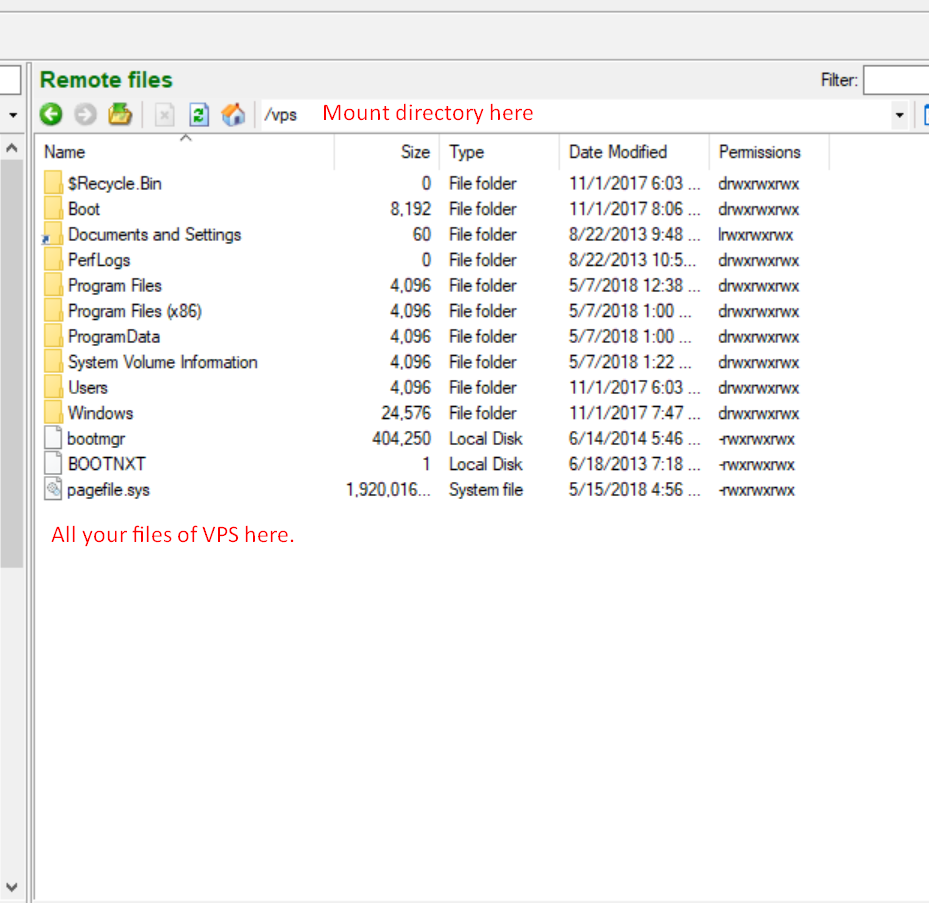
Ok, You can see all your data here.
You just need to download all your important data here,
Please note that, it is read-only, so you can not upload files here.
Once you complete the download, you can disable rescue mode by going to your VPS Control Panel.
Click Rescue Mode -> Disable Rescue Mode.
Thank you so much,
Copyright © PiVPS Ltd. All Rights Reserved.